Requesting Certificates in Internet Explorer
Certificate Request in Thawte
Before you can request a personal certificate in Thawte, you have
to first create an account. To create an account in Thawte:
-
Follow url:
https://www.thawte.com/cgi/enroll/personal/step1.exe
-
Click Next.
-
Select Charset and Fill in the Form.
-
Click Next.
-
Fill in your ID and email address (e.g.
[email protected])
-
Click Next.
-
Enter a password two times.
-
Click Next.
-
Enter Phone Number.
-
Answer 5 Questions.
-
Click Next.
-
Confirm your Information.
-
Click Next.
-
Wait for the Email from Thawte.
-
Click on url in the confirmation email.
-
Enter the Probe and Ping Information from the Email.
-
Click Next.
-
The Account Setup is completed.
-
Click Next.
To request for Personal Digital Certificate(s) from Thawte:
-
Follow the Link
https://www.thawte.com/cgi/personal/cert/contents.exe
using your Internet Explorer web browser.
-
When prompted for a username and password, input your e-mail and
password that you have registered from the steps above.
-
Click "request a certificate". (Figure 1).
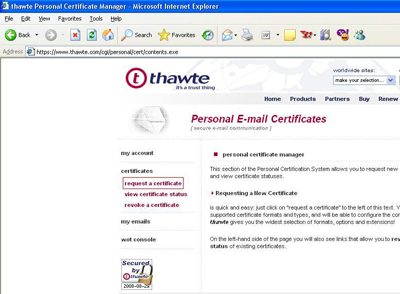
Figure 1: Click "request a certificate"
-
Click "request" (Figure 2).
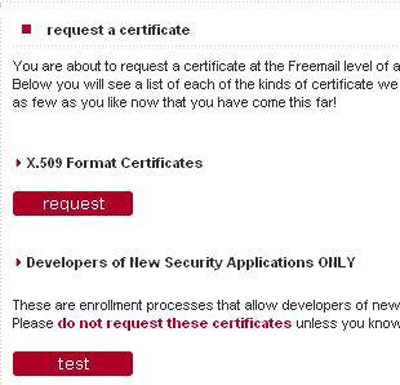
Figure 2: Click the "request" button
-
A pop-up box should appear (Figure 3 ). Since
you are in Internet Explorer, choose "Microsoft Internet Explorer,
Outlook and Outlook Express". You can also request a certificate
for "Lotus Notes R5" if you have installed Lotus Notes.

Figure 3: Choose the appropriate certificate and Click "request"
-
Click "request" and then click "next" on the "configure
certificate name" page.
-
The "configure email addresses for certificate" page will appear. Choose the e-mail in which you would like to include in your certificate and then click next
-
Click "next" on the "configure extranet capabilities for
certificate" page, and then click "accept" on the "configure X.509v3
certificate extensions" page.
-
On the "generate certificate public key" page, select "Advanced
Card Systems CSP vX.x" in the drop-down box (Figure 4). If the
said selection is not in the list, make sure that you have successfully
installed the ACOS5 SDK or the CryptoMate Client Kit.

Figure 4: Choose "Advanced Card Systems CSP vX.x"
-
If a Smart Card Selection Dialog UI appears (Figure 5)
with a status text of "The card is being shared by another process."
Then make sure to close Firefox, Thunderbird and/or Admin Tool. Do this to all
applications that has access to the card/token until the status text
becomes "The card is available for use." (Figure 6).
Then Click OK on the Smart Card Selection Dialog. If no Smart Card Selection
Dialog UI pops up you may skip this step and follow the next step.

Figure 5: There is an application sharing the device

Figure 6: The card/token can now be use
-
The ACS' CSP PIN Dialog UI will pop-up (Figure 7).
Input the PIN then click "OK".

Figure 7: ACS' CSP PIN Dialog Box
-
Wait while the device generates the keys for you. If the
operation was successful, a "confirm certificate request" page
will be shown. Click the "finish" button on the bottom of this page. A "personal
certificate requested" page will pop-up.
-
Wait for an e-mail confirming how and where to pick-up the
certificate. Usually the Subject of this e-mail is "Thawte Personal Cert
Issued".
-
If the confirmation e-mail does not arrive in 2 hours, then go to
the
Alternative way of picking up your certificate.
-
Once the e-mail has arrived follow the link given in the e-mail.
-
Click on Install Your Cert. If a Smart Card Selection Dialog
UI pops-up, follow Step 10.
-
If a Message Box with the title "Certificate Installation
Complete" pops-up, Click OK.
-
To see the Installed certificate in the smart card, go to
Certificate Verification via Admin
Tool.
Alternative Way of picking up your certificate
-
If the E-mail confirmation from Thawte does not arrive within
2 hours, follow this link:
https://www.thawte.com/cgi/personal/cert/status.exe

Figure 8: Check the status of your requested cert
-
Click the "MSIE" link. You will now see a Certificate Summary
page. At the bottom of the page click the "fetch" button and follow the
instructions in the "install your MSIE certificate" page.
-
Click Install Your Cert button.
-
Click Yes to allow the cert to be installed.
-
Click Yes again.
-
Your Certificate is now installed.
-
Click OK.
-
To see the Installed certificate in the smart card, go to
Certificate Verification via Admin
Tool.
Certificate Request in VeriSign
To request certificate in VerSign using Internet
Explorer, you can follow the steps below:
-
-
Fill out your First Name, Last Name, E-mail
Address and Challenge Phrase.
-
You can either choose to buy or request a free
certificate (Figure 9).

Figure 9: Choose between a Free or a Full-Service Certificate
-
Depending on the choice you filled out in Step
3, you can specify the Billing Information for full-service certificates. On
the other hand, if you chose to request a free certificate, then you can skip
the Billing Information section and go through the "Select Cryptographic
Service" section (see Next Step).
-
Choose "Advanced Card Systems CSP vX.x" in the
drop-down box (Figure 10). If you cannot see the "Advanced
Card Systems CSP vX.x" make sure you have properly installed the ACOS5
SDK/CryptoMate Client Kit.

Figure 10: Choose ACS' CSP in the drop down box.
-
Click the "Accept" button at the bottom of the
page.
-
If a Smart Card Selection
Dialog UI appears (Figure 5) with a status text of "The
card is being shared by another process.", make sure to close
Firefox, Thunderbird and/or Admin Tool, do this to all applications that has
access to the card/token until the status text becomes "The card is
available for use." (Figure 6). Then Click OK on
the Smart Card Selection Dialog. If no Smart Card Selection Dialog UI pops up
you can skip this step and follow the next step.
-
The ACS' CSP PIN
Dialog UI will pop-up (Figure 7). Type in the PIN and click
"OK".
-
If the key
generation process is successful, you will see a confirmation page for
the next instruction (Figure 11). If the page is not the one
below, then go back to the previous page and make sure you have filled out all
the required fields.

Figure 11: Next step in Verisign Certificate Request.
-
A confirmation
e-mail will be sent to the e-mail address you provided in Step 2. Wait for the
E-Mail confirmation from VeriSign.
-
Follow the steps
that are described in the e-mail confirmation from VeriSign.
-
You should now
be in the "VeriSign's secure Digital ID Center" web page (Figure 12).

Figure 12: Verisign Digital Certificate Pick-up Center.
-
Copy the Digital
ID PIN from the confirmation e-mail and paste it in the provided
textbox found in the web page.
-
Click the
"Submit" button. You should now be able to see an "Install Digital ID" page.
Click the "INSTALL" button at the bottom of the page.
-
If
a Smart Card Selection Dialog UI pops-up, follow Step 7.
-
When prompted
for a PIN. Enter the card/token's PIN in the PIN Dialog Box.
-
If the
Certificate Installation is successful, you will be transferred to a "Certificate
Installation and Registration Page". (Figure 13).

Figure 13: Verisign Certificate Installation and Registration Page.
-
Certificate Request in Comodo
To request certificate in Comodo using Internet
Explorer, you can follow the steps below:
-

Figure 14: Click the link "Enroll for your Free Secure . . ."
-
Fill out the form in "Application for Secure
Email Certificate". Fill-in your First Name, Last Name, E-mail address
and country. The Revocation Password is also required so fill-out the
Revocation password (Figure 15).
-
Click "Advanced Private Key
Options...", choose "Advanced Card Systems CSP vX.x" in the CSP
drop-down box . If you cannot see the "Advanced Card Systems CSP vX.x" then
make sure you have properly installed the ACOS5 SDK/CryptoMate Client Kit.
Uncheck the "Exportable?" check box.

Figure 15: Fill out all the fields.
-
If a Smart Card
Selection Dialog UI appears (Figure 5) with a status text of
"The card is being shared by another process.", make sure
to close Firefox, Thunderbird and/or Admin Tool, do this to all applications
that has access to the card/token until the status text becomes "The
card is available for use." (Figure 6). Click OK on the Smart Card Selection Dialog. If no Smart Card Selection Dialog
UI pops up you can skip this step and follow the next step.
-
Click the "Agree & Continue"
button at the bottom of the page.
-
You will be instructed to wait for
a confirmation e-mail, this confirmation e-mail will be sent to the address you
have filled-out above.
-
The confirmation e-mail can contain images and
other data (Figure 16). Follow the instruction in the
confirmation e-mail. If your default browser is Firefox, then you should
just copy the link (bellow the red button) and paste it in Internet
Explorer.

Figure 16: Comodo Confirmation e-mail.
-
In the "Collection of Secure Email
Certificate" page, enter your E-mail address and Collection Password.
The Collection Password is included in the confirmation e-mail that was sent to
you by Comodo.
-
Click the "Submit & Continue"
button.
-
If
a Smart Card Selection Dialog UI pops-up, follow Step 4.
-
Enter the Card/Token PIN when prompted.
-
If you are prompted to Install a Certificate
Authority Certificate (Figure 17), click "Yes".
This CA certificate is needed for windows to properly view the requested
certificate(s) from comodo.

Figure 17: Select Yes when asked to Install a Certificate Authority
Certificate.
-
A
web page will show regarding the status of the certificate installation.
-
Certificate Request in MS Active Directory Certificate Service
ACOS5 can be used to login to a domain server.
You will need an Active X and CSP-enabled browser (Internet Explorer 6.0+
recommended) to enroll a certificate.
To be able to use your token/card for smart
card-based PC logon, first configure your computer to be connected
on a particular domain (your company domain for example). This domain server
should also be configured to issue certificates. There are many sources in the
internet for configuring your Active Directory Certificate Service, so it
will no longer be discussed here.
First, let's configure your computer for smart
card logon. Follow this link to configure your PC
to be able to see the domain server. If the previous link is not similar to
your network set-up then you can ask your Network Administrator for some
help.
Example below shows how to enroll a certificate
in ACSDomain.acs.com.hk. Typically, certificate enrollment is done by an
authorized personnel in-charge of implementing smart card logon within the
domain (e.g. IT managers, Network Admin, etc.). An enrollment PC with
authorized access must be used to enroll certificates on behalf of the members
of the domain.
After you have successfully configured a
computer for domain log-on, then you can follow the steps below for requesting
certificates to your domain server:
-
Go to the Microsoft Certificate Service Page
(URL maybe different depending on the configuration of the Network Admin) see
Figure 18.

Figure 18: Microsoft Certificate Service Main Page.
-
Click on the "Request a certificate"
link.
-
Click the "advanced certificate request"
link (Figure 19).

Figure 19: Click advanced certificate request.
-
In the Advanced Certificate Request
page. You can select which type of certificates you want to request. In this
scenario, before you can request any type of certificate, you should first have
an enrollment agent certificate (Figure 20).
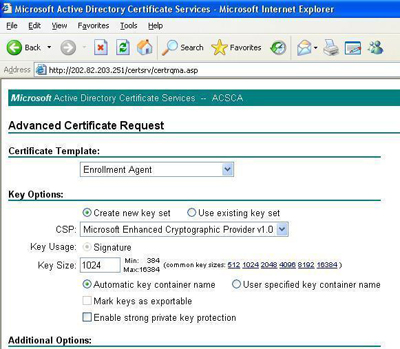
Figure 20: Requesting an enrollment agent certificate.
-
If you already have an enrollment agent
certificate then you can skip to this step. If you
don't have an enrollment agent yet, then you can fill up the page as shown in
Figure 20. Click the Submit button at the bottom of the page.
-
Wait until the server has responded, if the
process is successful, you will be prompted to install your newly generated
enrollment agent certificate (Figure 21).

Figure 21: Install the newly requested certificate.
-
Click "Install this certificate". Follow the
pop-up direction. You will be prompted once your certificate has been
successfully installed in your computer.
-
Once you have successfully requested an
enrollment agent, go back to the Advanced Certificate Request page
as shown in Figure 22.

Figure 22: Advanced Certificate Request main page
-
Select "Request a certificate for a smart card
on behalf of another user by using the smart card certificate enrollment
station".
-
In the "Smart Card Certificate Enrollment
Station" page, depending on the domain user that you want to
enroll, choose the settings as shown below (Figure 23)
and then click on the Enroll button. Note that the
ACS CSP version might be different depending on the version of the package that
you have installed.

Figure 23: Choose the settings as shown above.
-
Once a certificate has been successfully
generated, you will be prompted to install it to your card/token (Figure 21) .
Follow Step 7 to install the newly generated certificate to your card/token.
-
.
 2009 Advanced Card Systems. All rights reserved.